
Contact us 01889 597 283 | contact@oaktimberstructures.co.uk

Contact us 01889 597 283 | contact@oaktimberstructures.co.uk
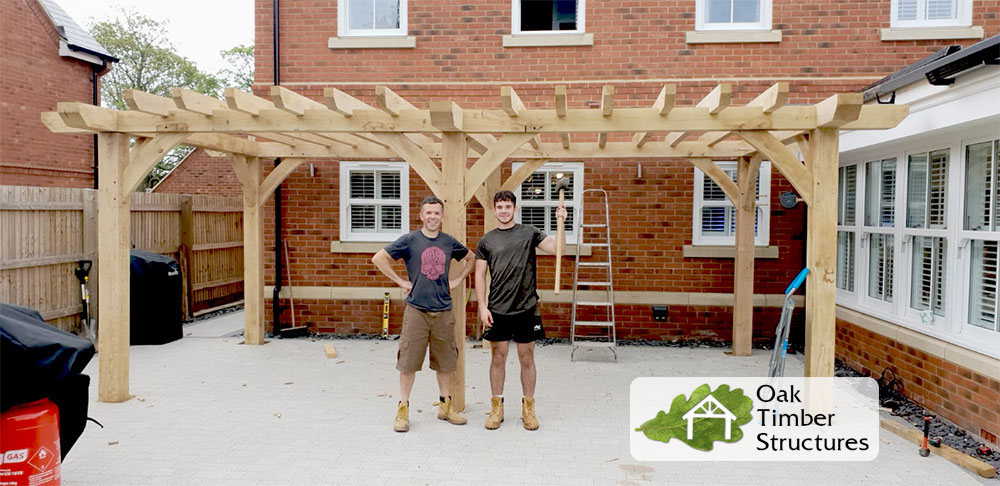
It's understandable to have trepidation when planning to build an oak structure. Have I got the physical capability? Do I possess the skills required? These questions may have you doubting.
Whether an oak framed self build is an option to you often comes down to these factors:
Let's look deeper into the installation of an oak structure. While it's reasonable to have reservations about going DIY, we make the process straightforward. Read on to see if building your oak framed structure is for you, or if you're best leaving it to the professionals.
Let's start by saying the skilled work is complete with a kit. Ever heard the saying "measure twice, cut once"? Well, you don’t need to stress about this golden rule, because a kit comes complete with parts cut to your desired size.
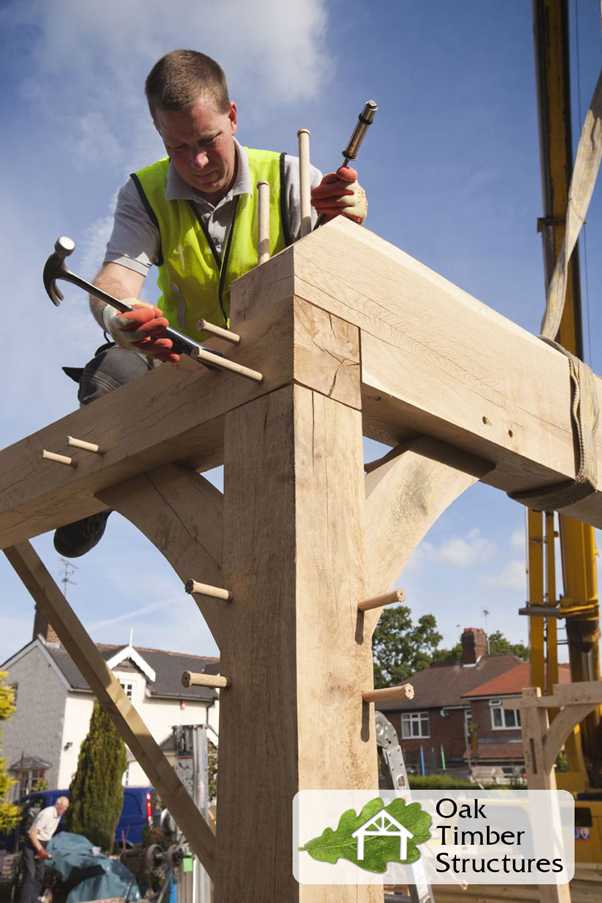
Furthermore, the tricky joints are complete, so it’s just a matter of assembling the frame, which is actually easier than you think. Our oak kits for example are marked at connecting points to avoid confusion, so align the joints and secure them into place with the supplied oak dowels. There’s no skilled carpentry work needed on your side.
It's a surefire, speedy method to be the proud owner of an oak framed self build. However, one of the biggest variables you'll face is the structure itself. Building a two-story garage will, of course, require an increased workload than a single-bay pergola.
So here's a list of structures with a rough guide of their difficulty and some things to consider. Remember, though, it’s a guide. All structures are bespoke to you, which means even simpler structures can have add-ons which will increase complexity.
A consideration before starting the build is planning permission. It’s commonplace that structures such as pergolas and gazebos fall into the permitted planning category as long as they’re:
According to PlanningPortal.co.uk
So for extending with a garden room, for example, it’s important to check in beforehand. Even if you think your outbuilding structure falls into the ‘permitted planning’, you should always check with local authorities. Rules change, and your geographical location may have different rules.
Preparation is the vital first step to success. Solid, level footings support the structure's weight, so they need to be adequate to avoid subsidence.
We'll always suggest professional consultation here because structure sizes and ground makeup vary.
To understand the weight, a 3Mx3M gazebo with 150mm posts weighs almost a ton, so each post supports around 250kg. A common solution is 60cm x 60cm concrete pads, also going 60cm deep below the surface, although requirements vary depending on ground conditions and structure size.
But you may not need pads; a flat patio space could be all you need. Many homes have existing patio space, and that could be all you need for a pergola or gazebo.
A professional patio job with a solid sub base of hardcore below could be enough to prevent slabs from sinking under the weight of a structure.
Foundations for an oak framed garage, for example, will have different requirements because they sit on brickwork and will oftentimes have much more weight. A common approach to garages and large structures is as follows:
To read more information about footings head to our guide on oak structure foundations.
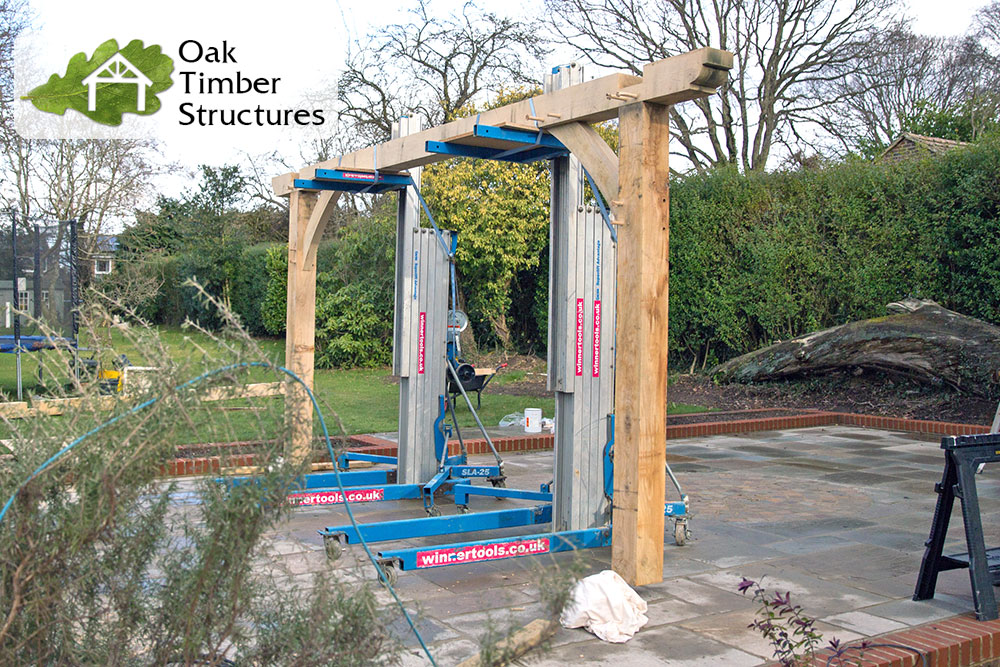
There are some handy tools for an oak-framed self-build that can make light work of assembly.
Knowing the weight of an oak beam, holding it in place is strenuous regardless of how many hands are taking the brunt. A Genie Lift takes the weight of beams, allowing you to align joints easily.
A quick search and you'll find there are local places you can hire them short-term. Different models are available with maximum lifting heights, so make sure you pick one that has sufficient height.
That being said, the GL-4 is the lowest spec and has a lifting height of 1.8M and a capacity of 227 kg, so it should suffice for most pergolas and gazebos.
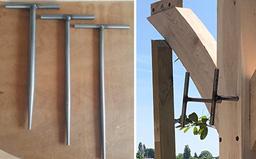
With a lift holding beams in place, T-Bars, or sometimes called framing pins, can come into play. Mortise and tenon joints with dowel holes hold the frame together. With the dowel holes aligned, you can pop the framing pins for a temporary hold.
This tactic will fill you with confidence that the structure is correct and make sure no errors are made. When inserted, the dowels are secure for a strong connection. If there's a mistake, dowels tend to need drilling out. Framing pins are a safety net before you hammer the structure's joints securely.
While trusses have very few parts, for structures like gazebos, blueprints are usually supplied to indicate where each post and beam connects.
The tops of posts have labels, indicating where the parts attach. Likewise, the mortise and tenon joints will have clear marking so you can match the mortise, or the hole, to the protruding tenon joint.
A common process is to work alongside the drawing and lay all the pieces out to plan the workflow.
There are some key bits of information you should know:
Before assembly, some may want to treat the oak. It’s not necessary as oak is durable. Think about whiskey barrels and even ships that were made from oak for thousands of years.
Still, you can treat the oak beams. While it’s a timber of natural robustness, specific treatments can delay silvering and more. We cover the best oils in our weatherproofing guide.
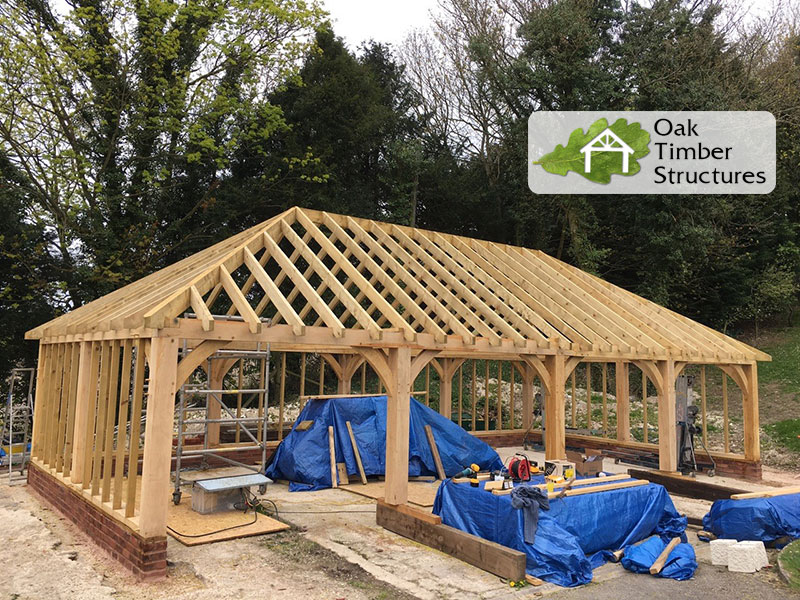
Roofing a structure is usually your last step. Obviously, this doesn't apply to all, so it might be time to kick back and admire your work. Nonetheless, if you've included a roof it can sometimes be the most daunting part about assembly. But let's simplify it:
For this example, we’ll use a hipped roof on a square gazebo.
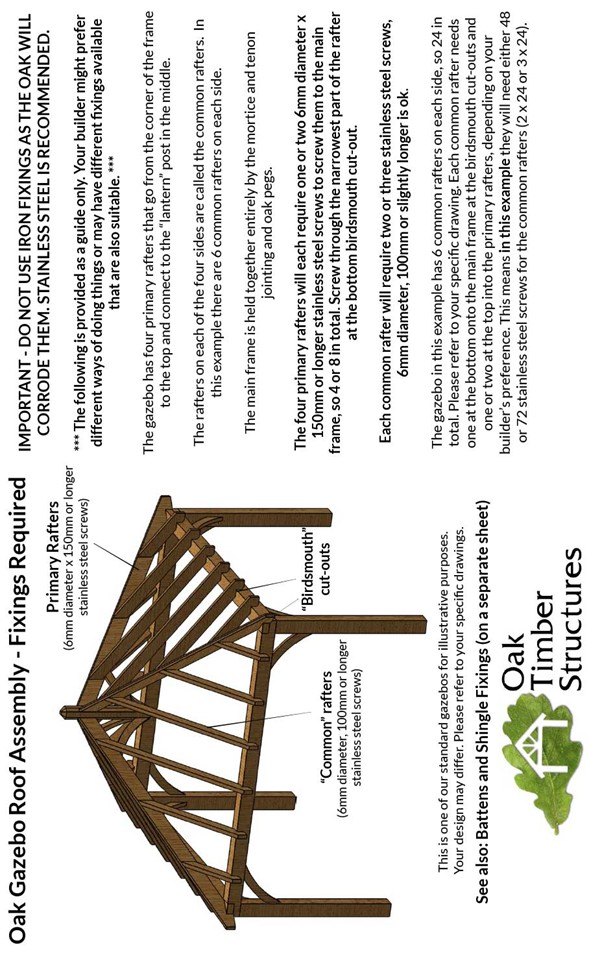
The primary rafters are the four main roof beams that run from the four corners to the middle hip. These have birdsmouth cuts so they can rest on the corners. The primary rafters should be fixed to the top plates through the narrowest part of the birdsmouth.
Common rafters run from the top plate to the primary rafters. The number of common rafters will depend on the size of the gazebo. You can fix these into the birdsmouth on the main frame and into the primary rafters.
Battens run at a right angle to the rafter providing a fixing point for shingles. You’ll secure the battens to the rafters.
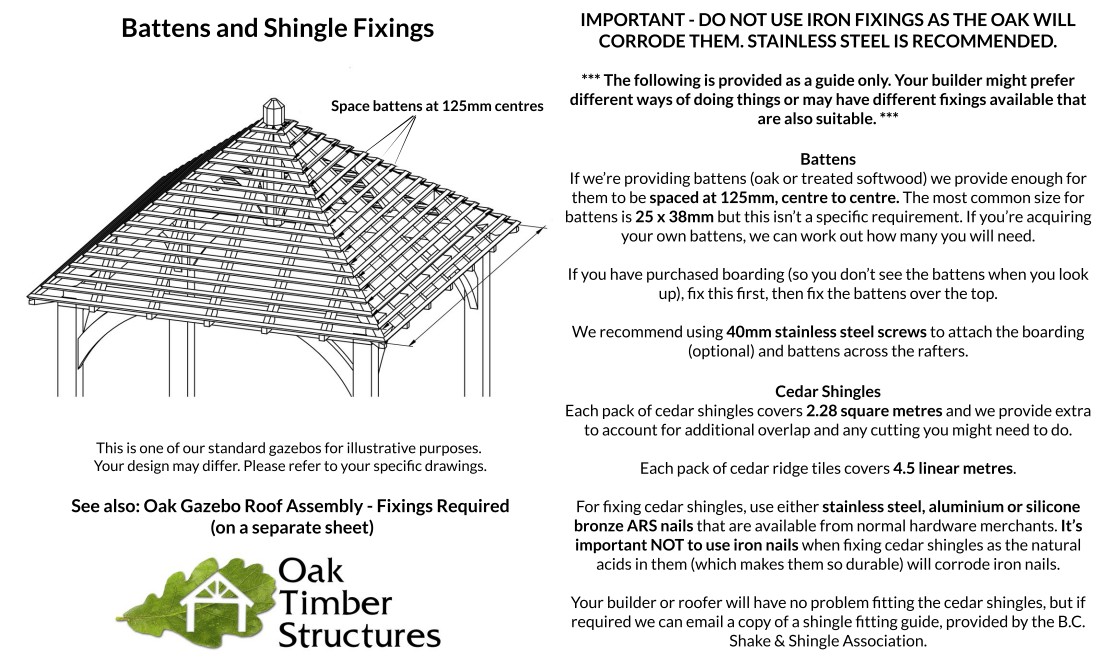
Various roofing tile options are available, cedar shingles are a popular choice to match with the natural timber frame. Slate and ceramic tiles are another option, particularly if you want to coordinate with existing tiles on your property. At Oak Timber Structures we supply both cedar shingles and a lightweight alternative to slate called BritMet tiles in a variety colours. Tiles and shingles should be fixed to the previously installed battens.
For this example, a hipped roof, the shingles will meet, and there’s a protruding central oak hip at the top. This can be waterproofed with flashing, usually aluminium or lead. Placed over the hip, the flashing will direct water onto the shingles.
With skilled carpentry work complete, assembling a kit is an easy way to build an oak framed structure. While some structures such as pergolas have a less demanding workload, others like orangeries will fall into the professional category involving foundations, brickwork, glazing and roofing alongside the oak frame.
Here’s the thing, if you think it’s beyond your capabilities, there’s no need to worry. A general builder or landscaper for garden structures will find our oak kits a breeze. One of many reasons we’re trusted by the elite construction and landscaping companies.
For more technical specifications such as suggested screw sizes, request our comprehensive Oak Timber Structures Information Booklet. We’re always on hand to help, so drop us an email or call. We understand that building with oak is an investment, and we’re here to make sure the project is a flawless success.
Have more questions? Check the below out for a quick guide on some commonly asked questions:
Oak beams can vary in moisture content and can be anywhere between 1000 - 1200 kg per cubic metre, as an example, a 150mmx150mm beam can weigh approx. 27kg per metre.
It can be tough on your own but with a genie lift, more simple, smaller structure kits can be assembled.
After preparing groundworks (see section above for more information), to assemble the oak structure kit you will need - a mallet/hammer to hammer in oak pegs/fixings and means to hoist the beams into position. A nail gun will make things easier for fixings but not mandatory.
You can expect an oak kit to arrive as a flatpack kit typically 1m wide and as long as the longest piece. For delivery, at Oak Timber Structures, we offer both flatbed and assisted options. The former will require a forklift onsite or plenty of help as the beams are very heavy.
Small splits and surface cracks are normal in green oak as the timber naturally dries and settles. It is important however to assemble the structure as soon as possible as the oak will lose moisture over time and joints may become misaligned. This can happen in as little as 3 weeks in the summer. Should this happen, you may simply have to re-drill the holes.
No, oak is extremely durable. If you would like to maintain the oak colour rather than letting it weather to a charming silver-grey, you will need to apply a UV protection oil and reapply as directed by the manufacturer.
Written by Oak Timber Structures, specialists in bespoke oak frame design and manufacturing.


